It may seem counterintuitive to do a prologue about a completed product, I can assure you however that that was a mere prototype of my coming masterpiece. Living in residence for 3 years had taught me to cherish space and to continually strive to find a better arrangement for my possessions, especially larger furniture. So moving into my new place I was determined to get it right!
Parts list
8-10 x [2" x 6" x 8' ] Pine planks, try to choose ones with minimal warp
1 x [2" x 4" x 8' ] Pine Plank
~60 x [3"] Galvanized screws
12 x [1/4" x 3 1/2"] bolts with matching nuts
24 x [1/4"] large diameter washers
1 x [ 1L ] Can wood primer / self priming paint etc
Notes: I am not too sure of the final number of 2"x6" planks used, though I can remember being one or two short. Similarly with screws since ~5/leg (4x) + 4/slat (6x) + 4/ frame end (4x) = ~60
Tools List
Miter Saw
Hand saw / reciprocating saw
Tape Measure
Square
Pencil
level
Cordless drill
Appropriate drill bit for screws (I happened to use square head)
1/4" Wood drill bit
Wrench set
Tile / solid flat surface
Sand paper [80 + 200 grit]
Paint brush
Process
The dimensions of the twin-long mattress I had came from
About.com:Interior Decorating, cheesy I know. This meant I had to design a frame to comfortably fit a 39"x80" mattress. To make sure I wasn't going to run out of space I decided to construct a frame at an arbitrary 40"x82".
Components...
Step 1: Cut two of your 2x6" planks down to a length of 82" and notch the end with your hand saw as seen in the picture below.
Step 2: Cut two 40" long head pieces out of a single 2x6" board and notch as shown in the photo below.
Notes: The notching allowed the weight of the mattress to be distributed evenly across the bed rather than attempting to dovetail the two planks.
Step 3: Arrange the cut planks as shown in the following photo, make sure the beam (longer) rails sit atop the head rails (this is the opposite of what is show here)
Step 4: Cut down 3 of the 2x6" planks to form 6 ~37" mattress slats, it is helpful to measure here as bowing the the wood can require the slats to be slightly longer or shorter.
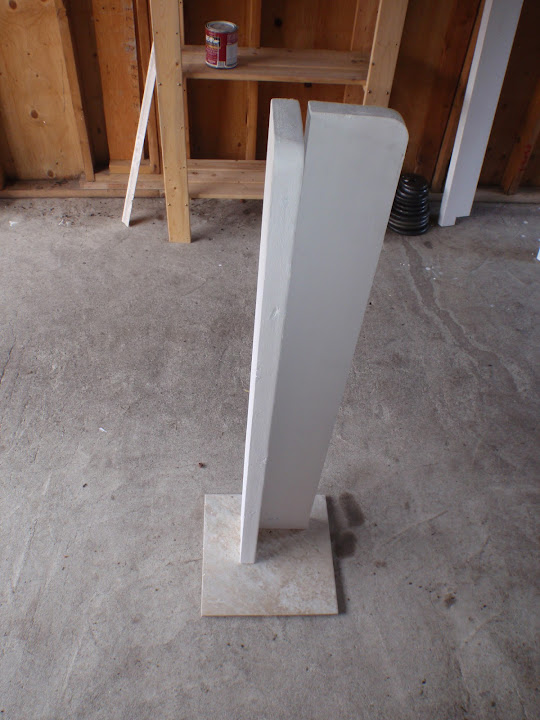
Step 5: Cut down 4 of the 2x6" planks to form 8 - 46" long leg components and round off one corner for aesthetic / safety reasons
Step 6: Cut down the 2x4" plank to form 2 - 36" ladder rungs.
Step 7: Now that all of your components have been cut to size it's time to prime / paint / coat them. I used
Behr sealer no. 434 purely because I happened to have a can of it from a previous project; also the initial plan was to give it a more elaborate paint job. I think I gave them 2-3 coats since the wood seemed to soak up the primer like mad.
Assembly...
Step 1: Arrange the dried frame on a flat surface and pre drill two holes into the adjoining notches as seen in the photo below. Then fix together with screws. Repeat on all four corners.
Step 2: Insert the mattress slats as shown in the following photo and connect to the frame by pre drilling and then inserting two screws in each side.
Aside: While I never encountered a problem with loading it would be a very good idea to run a 2x4" Rail below the slats two support them as a unit.
Step 3: Align the leg pieces on your tile or flat surface as show below and affix each together with 5 evenly drilled screws. Repeat this procedure 4x. It is important to note here that with this method one dimension of your leg will be longer than the other. Therefore I recommend labeling your legs and determining which corner of the bed you want the to support and therefore which orientation to affix the leg posts together for maximum esthetic appeal!
Step 4: Attach pairs of legs to frame - This requires first drilling 1/4" bolt holes 40" up in the middle of each leg piece on both the beam and head board side. It is critical that these two holes are inline or one bolt will suffer excess loading. Next measure down on your legs 3" and scribe a line along that point, this will be the top of the frame. I discovered at this point that this much wood was rather heavy so the next part might require a friend / helpful chair. Propping the frame up at an angle against your friend/chair and align the top of the bed frame with your scribed line. Using your 1/4" bit and the hole you drilled through each leg as a pilot drill through the frame. Before your friend collapses insert the bolts through the recently drilled holes with a washer on each side and cinch down.
Step 5: With the legs still attached at the other side it becomes a lot easier to drill and mount the remaining two legs.
Step 6: Finally attaching the two ladder rungs can be done either with screws, or with bolts. After experimenting with both I found no structural difference in the short run. The two rungs are located at 1' and 2' respectively and are attached by holding the board in place while drilling a screw into one side and then rotating till level before drilling into the other side. HAving done this you can either remove the screws and pre-drill 1/4" bolt holes through both the rung and the bed leg or add 2 extra screws on each side for extra support.
Step 7: Heave your mattress on top of the bed
Testing...
Step 1: Construct a detailed testing criteria including, but not limited to:
- Sleep on bed, both directions
- Jump off/onto bed
- Rock bed laterally and longitudinally
- Load bed with extra mass
- Take the bed out for a picnic
- Frolic on bed
- Disassemble and reassemble frame
Conclusions:
- 2x6" boards make for an incredibly stable/heavy frame
- Always use large diameter washers when bolting onto wood
- Screwing together corner pieces works well, however has low esthetic appeal
- End ladders form great lateral supports
- Rounding out legs top edges prevented many likely injuries
- Adding an inner rail to support bed slats would have been a good idea
- I don't roll around that much in the night
This was a great project to sink my teeth into and took about 48 hours most of which was spent waiting for primer to dry. Leaving my old place I entrusted this frame to a friend, and look forward to my next frame which promises to further push the envelope of loft bed design.
Coming soon: Loft bed - Part 1 (Design)
Additional photo's can be found on my Picasa Album, unfortunately blogger is proving inept at handling photo's at the moment so Hyperlinks are presented instead. Also if you are considering replicating this design I should warn you that I am in no way a professional wood worker, and provide this for interests sake alone.


![[Photo Planks]](http://lh3.ggpht.com/_CwrpHjLDI9k/TGW9oPah9EI/AAAAAAAAAeY/5-kOC-iwdqs/s720/Screen%20shot%202010-08-13%20at%2013%20Aug%2012.47.05%20PM.png)
![[Photo Notch]](http://lh3.ggpht.com/_CwrpHjLDI9k/TGW7WWJgNbI/AAAAAAAAAdE/qRA_06lqk0M/s912/P9160003.JPG)
![[Photo of Frame Arranged]](http://lh3.ggpht.com/_CwrpHjLDI9k/TGW7WnUXVdI/AAAAAAAAAdI/0hWk0L90XEg/s912/P9160004.JPG)
![[Photo of boards drying]](http://lh5.ggpht.com/_CwrpHjLDI9k/TGW7-VX-CwI/AAAAAAAAAdg/LWAf9-Rn-ww/s912/P9160009.JPG)
![[Photo of frame with slats]](http://lh4.ggpht.com/_CwrpHjLDI9k/TGW7_9v_C1I/AAAAAAAAAdw/Q1pSDm9T8D0/s912/P9160015.JPG)
![[Photo legs half on]](http://lh4.ggpht.com/_CwrpHjLDI9k/TGW8lwgXJEI/AAAAAAAAAd8/SckXXm3Aj-8/s912/P9160016.JPG)